“How we do it”- Design options for simple signage
This is a information page showing several different options for creating a sign using the same basic design, but processing in different ways.
The “design”
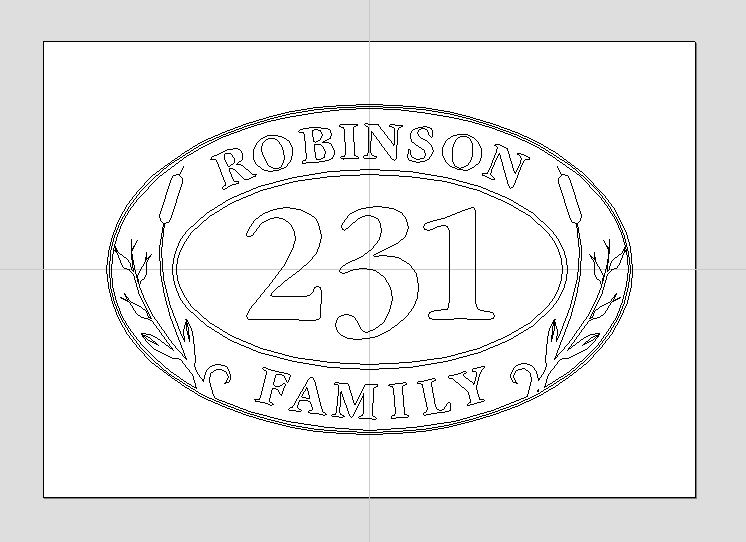
This illustrates the basic vector lines of a simple but attractive design
This is a file I was asked to quote on. The design was provided by Scutt Signs here in Guelph. The line drawing consists of vectors that can be scaled in size up or down. The best option for designing is full scale or the actual sign size. My cad-cam software only recognizes vectors, and not bitmap data, so even if colours are included in the file, they will not be seen on the screen.
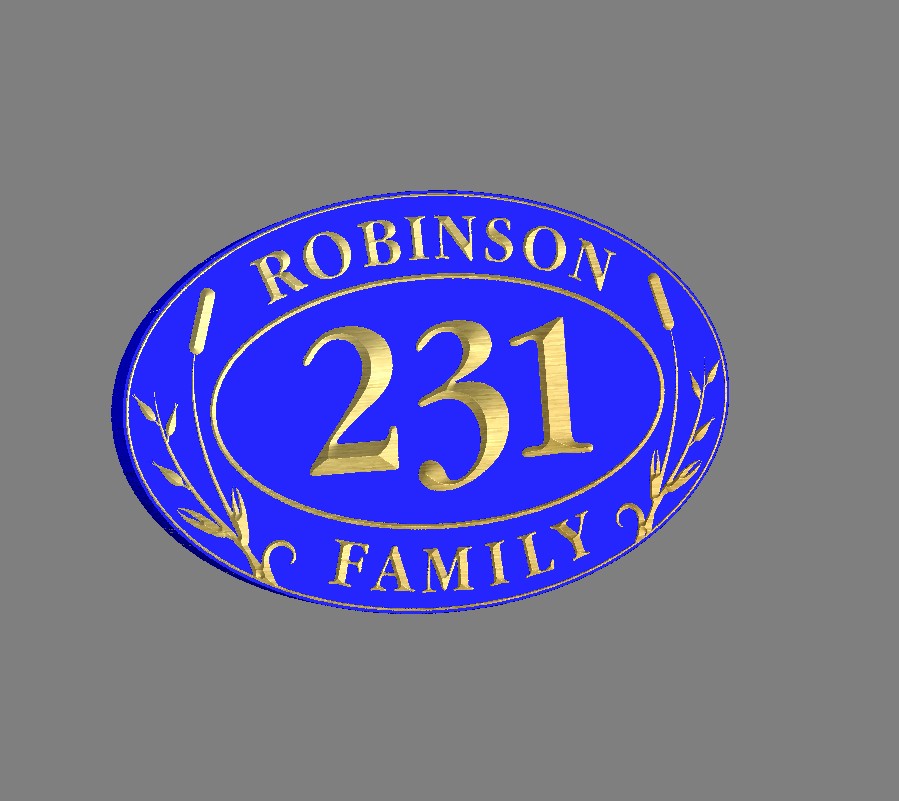
Engraved letters.
Option #1-Engraved
Engraving is the most economical and quickest method of creating this style of sign. Both the front and back of the sign faces are primed and finish painted. After the paint is well dried, a “paint mask” is applied to the surface that is to be engraved. The paint mask is usually an inexpensive vinyl material with a semi-permanent adhesive.
Once the adhesive has been applied, the blank is affixed to the machine, by screwing it down, or if there is enough surface area a vacuum table can be used. I prefer to screw the blank to a sacrificial piece of plywood, and then use the vacuum as a hold down. Another option is to use outboard clamping if no vacuum is table is available.
The graphics and letters are carved out using a “V” tool and the “V”-Carve option of the software, with just the individual features and letters selected. The toolpath is created and posted to the machine for cutting. After cutting, the engraved letters and outside profile are painted, and after the paint has dried, the mask is removed. At this point, a clear top coat can be applied for longer UV protection, and service.
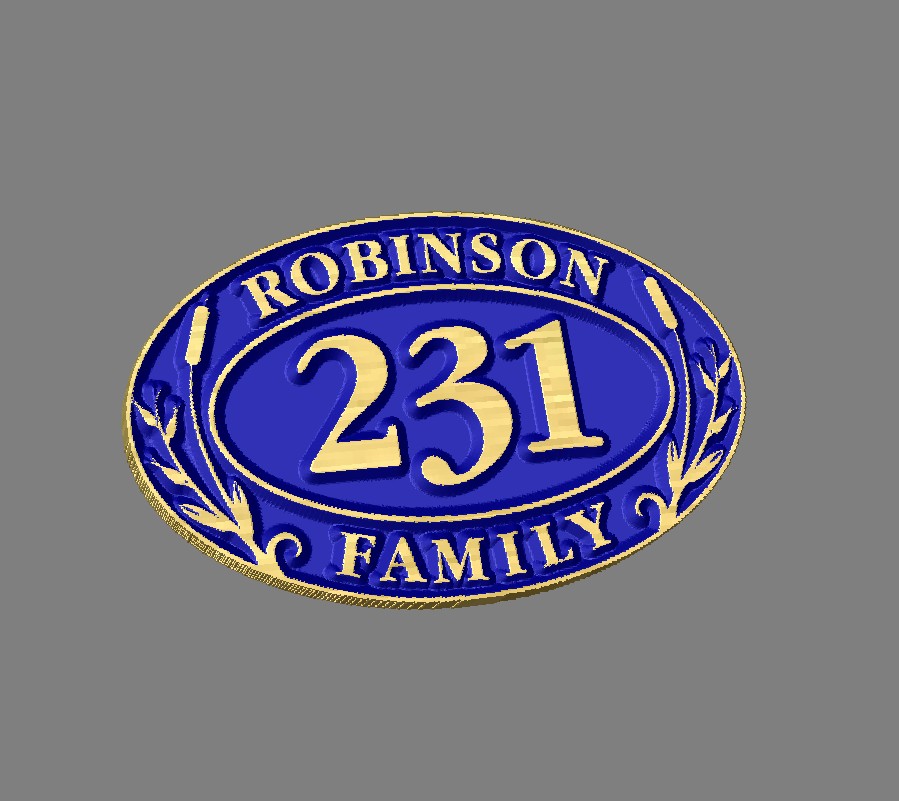 Option #2-Relief carving
Relief carving is the opposite of the engraving process. With relief carving, the area around the features is removed leaving the message raised. The process starts very similar to the engraved process, but the raised area is painted the appropriate colours prior to applying the mask.
The same “V” carve process and tool is used, as well as adding a second tool, usually a flat bottomed bit is used to remove the bulk of the material left from the “V” cutting process. The same profiles are selected, as well as the outer profiles of the areas for cutting.
After the sign is cut, the area removed by the cutters is painted, and the mask removed. The outside profile is also painted, and the sign is finished.
Since we have added another tool path to this option, the cost does increase from the engraving option.
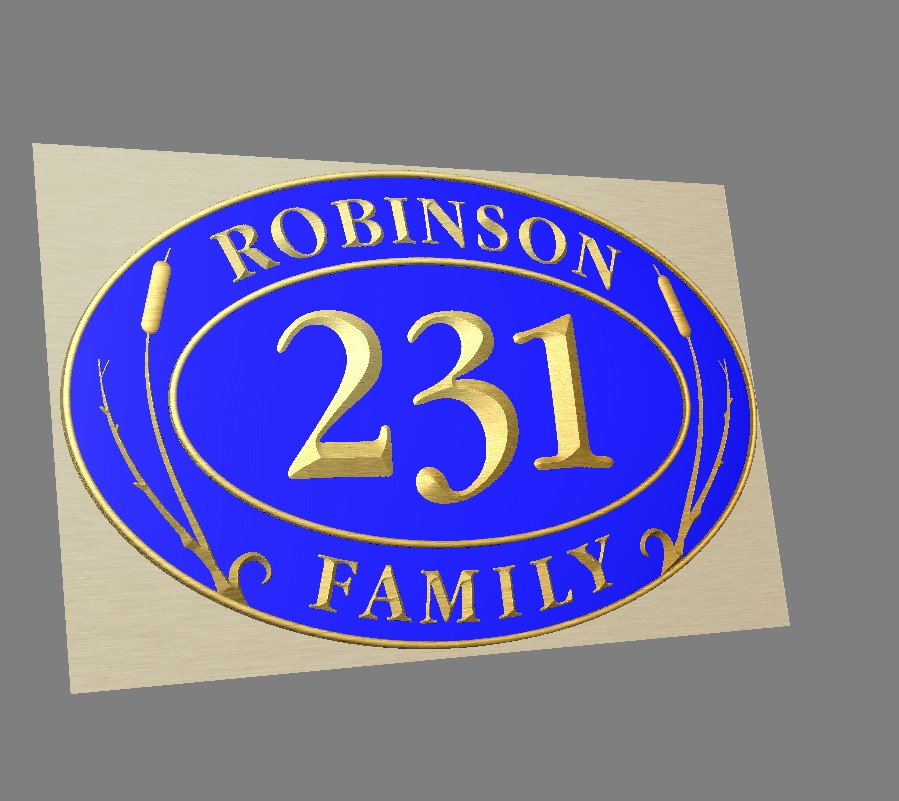 Option #3-Full 3-dimensional carving
Full three dimensional carving is last option we are going to look at. This requires software that will allow the design to be built onto the base of the project. Each element of the design is separated and created to assemble the final piece. This part of the design can be quite time consuming, and offers the digital sculptor many different options. If you are considering this type of sign, it’s wise to take a picture of signs with similar elements. There are many ways to create and assemble 3D designs. To keep design costs low, you should choose the most desirable elements that you want to incorporate in your sign.